Report History
This section describes the "Medical Reports" interface in Speaknosis, detailing how to access, view, and manage the reports generated from medical consultations. You can filter reports by status: Approved and Unapproved.
To view medical reports, you can do so through the administration panel or through an endpoint method. The following explains the visual interface for viewing medical reports in the administration panel.
1. Viewing Reports
The main "Medical Reports" screen displays a history of all generated reports, with options to filter by status:
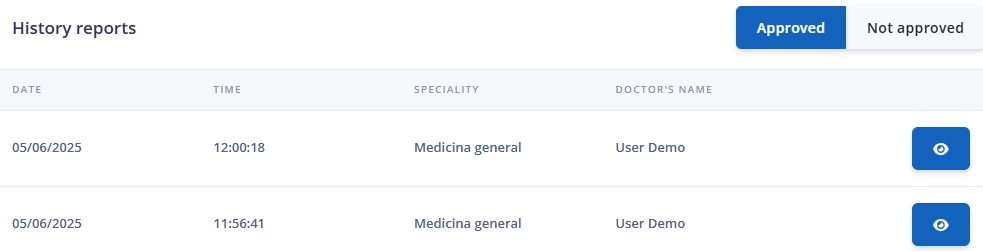
This image shows the main screen with two buttons:
- Approved: Displays only the reports that have been approved.
- Unapproved: Displays only the reports that have not been approved.
Each row in the table corresponds to a report and contains:
- DATE: Date of the consultation.
- TIME: Time of the consultation.
- SPECIALTY: Doctor's specialty.
- DOCTOR'S NAME: Doctor's full name.
- Actions (eye icon): Click here
 to view the report details.
The history is ordered chronologically, with the most recent consultations first.
2. Report Details
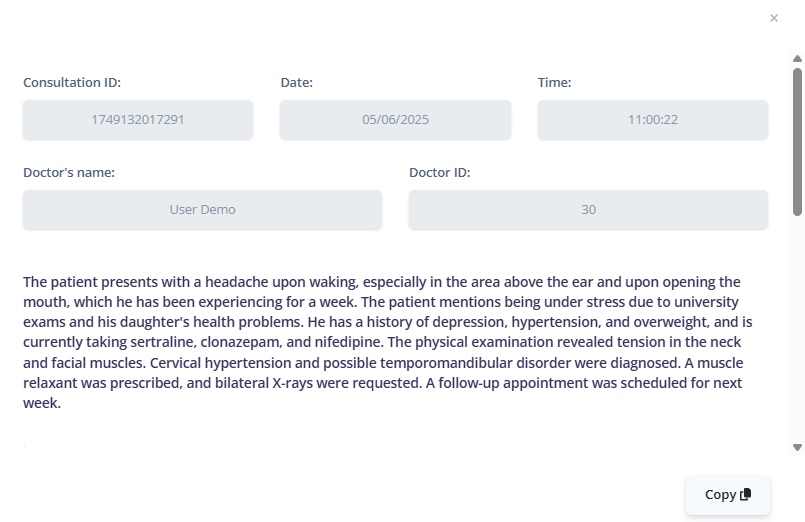
Clicking on the ![]() icon will take you to the detailed view of the report. This image is a static capture; the actual view has a vertical scroll to display all the information.
icon will take you to the detailed view of the report. This image is a static capture; the actual view has a vertical scroll to display all the information.
The fields shown in this section are:
- Consultation ID: Unique identifier.
- Date: Date of the consultation.
- Time: Time of the consultation.
- Doctor's Name: Doctor's name.
- Doctor's ID: Doctor's ID in Speaknosis.
- Consultation Summary: Full generated text.
- Actions (Copy Button): Below the report you will find the
 button. Clicking on this button will copy the full text of the report to the system clipboard. You can then paste this text into another document or application.